
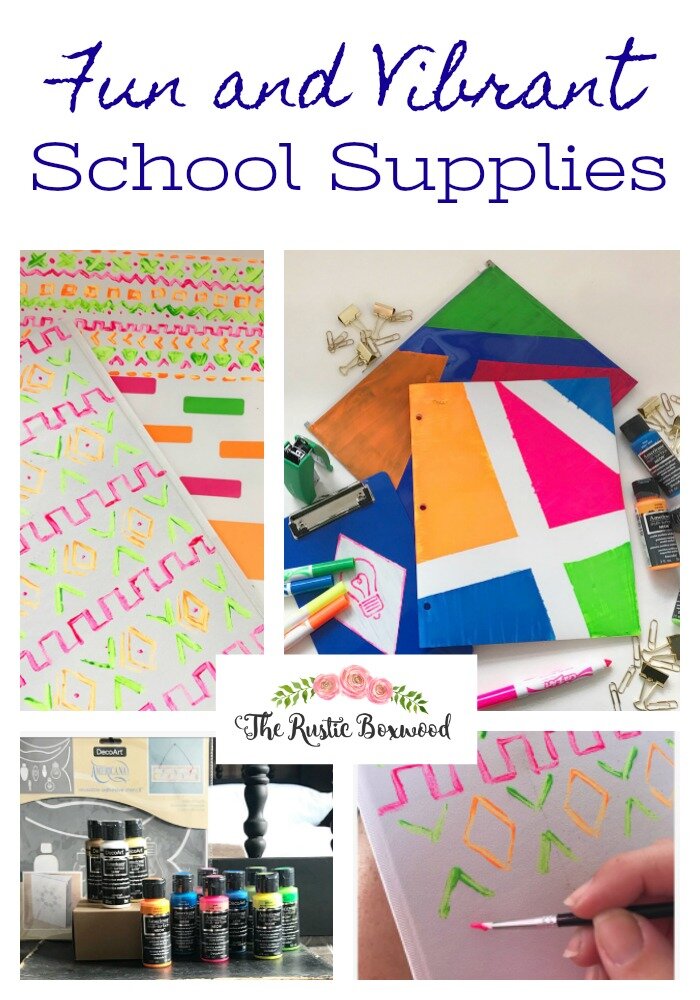
Fun and Vibrant School (or Office) Supplies
Hey friends! Thanks for stopping by today! Don’t forget to come find me on Instagram, Facebook and Pinterest in order to stay up to date with all the happenings and projects on the blog!
*******************************************************
Can you believe it's already that time again?! Our summer break always seems to go by way too quickly. So to help with the transition into the school year, I've teamed up with DecoArt to share with you guys how to kick your school supplies up a notch...how to make them fun and cheerful!
(And I have to mention....I still can't believe DecoArt invited me to be one of their Core Bloggers for the year! I've worked with them now and then for the past couple of years, but never as a Core Blogger! I'm honored and thrilled to be one of the 15 bloggers....There are some big names in this talented group, and to be alongside them is a huge honor. Click this link to see the other fabulous ladies in this group, and if you missed my first official post as a Core Blogger, click this link to learn how to make aged, faux-moss pots. Thank you again, DecoArt, for giving me this awesome opportunity!)
Here's what you'll need for your vibrant school (or office) supplies:
Americana Acrylic Paints (to be used as a basecoat under the neons for added brightness, but not required; colors listed below in the post)
Paintbrushes
Adhesive stencils (I chose the "String of Lights" adhesive stencil, but check out the vast array of stencils that DecoArt offers!)
Paint brushes (1 per color)
School or office supplies, such as notebooks, pencil holders, binders, folders, etc.
FrogTape (not required)
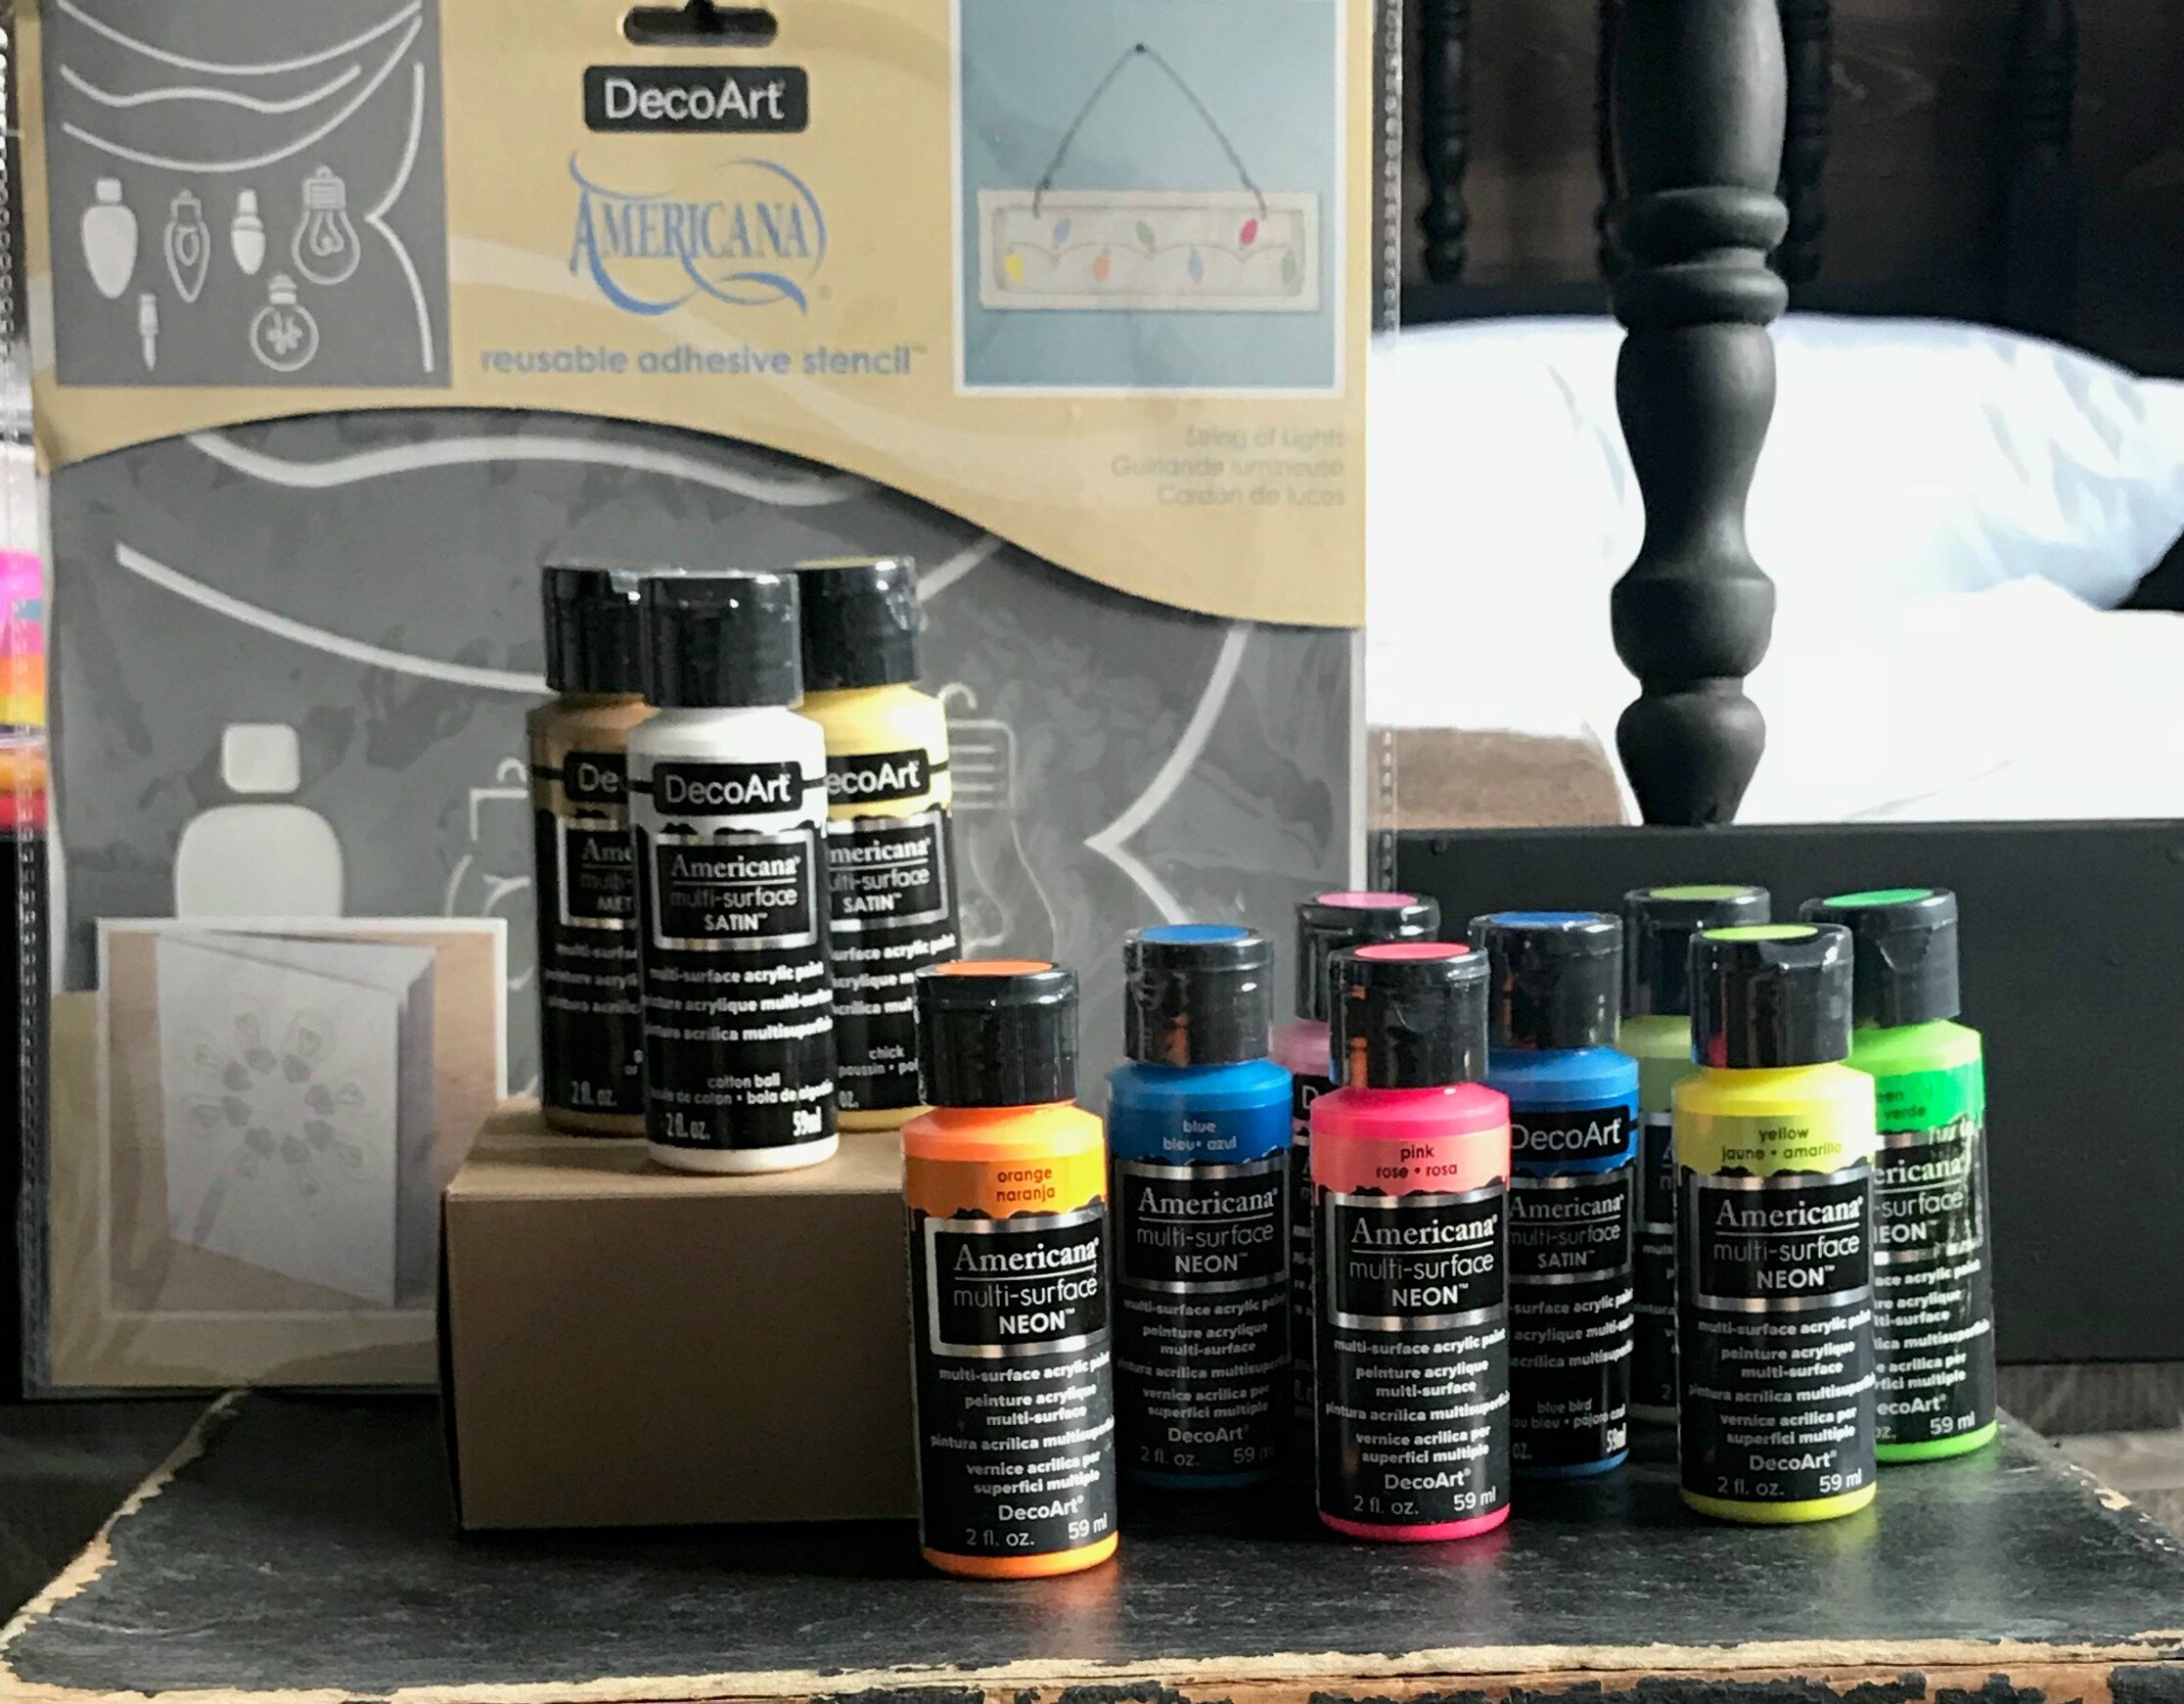
I don't know about you, but I LOVE neons, and this neon paint line is fantastic! I've been VERY pleased with them! I love that they maintain their brightness, even through dark backgrounds, such as some of the school supplies we used!
There are a couple of different routes I took with this project...the "mudcloth" pattern and geometric patterns using the neons and the "lightbulb" pattern using the gold tones. I love how these turned out SO MUCH!!
Project #1: Binder
Let's start with the diy, freehand mudcloth supplies. I chose a white binder to use for my first "enhanced" school essential. This project was super easy to do, and I only painted one layer of paint.

I used the following neons:
Pink
Orange
Green
Since all acrylic paints dry quickly, squirt out only a little at a time, and because I used Frog Tape for this project, I repurposed its container into a painter's tray, which was perfect. Of course, you could always just use a paper plate or squirt it directly onto the school supplies.
I searched everywhere for the perfect mudcloth pattern I wanted to use, and I found this pattern on Pinterest on some wallpaper. The nice thing about mudcloth is that it's meant to look freehand, so that worked in my favor. ;)
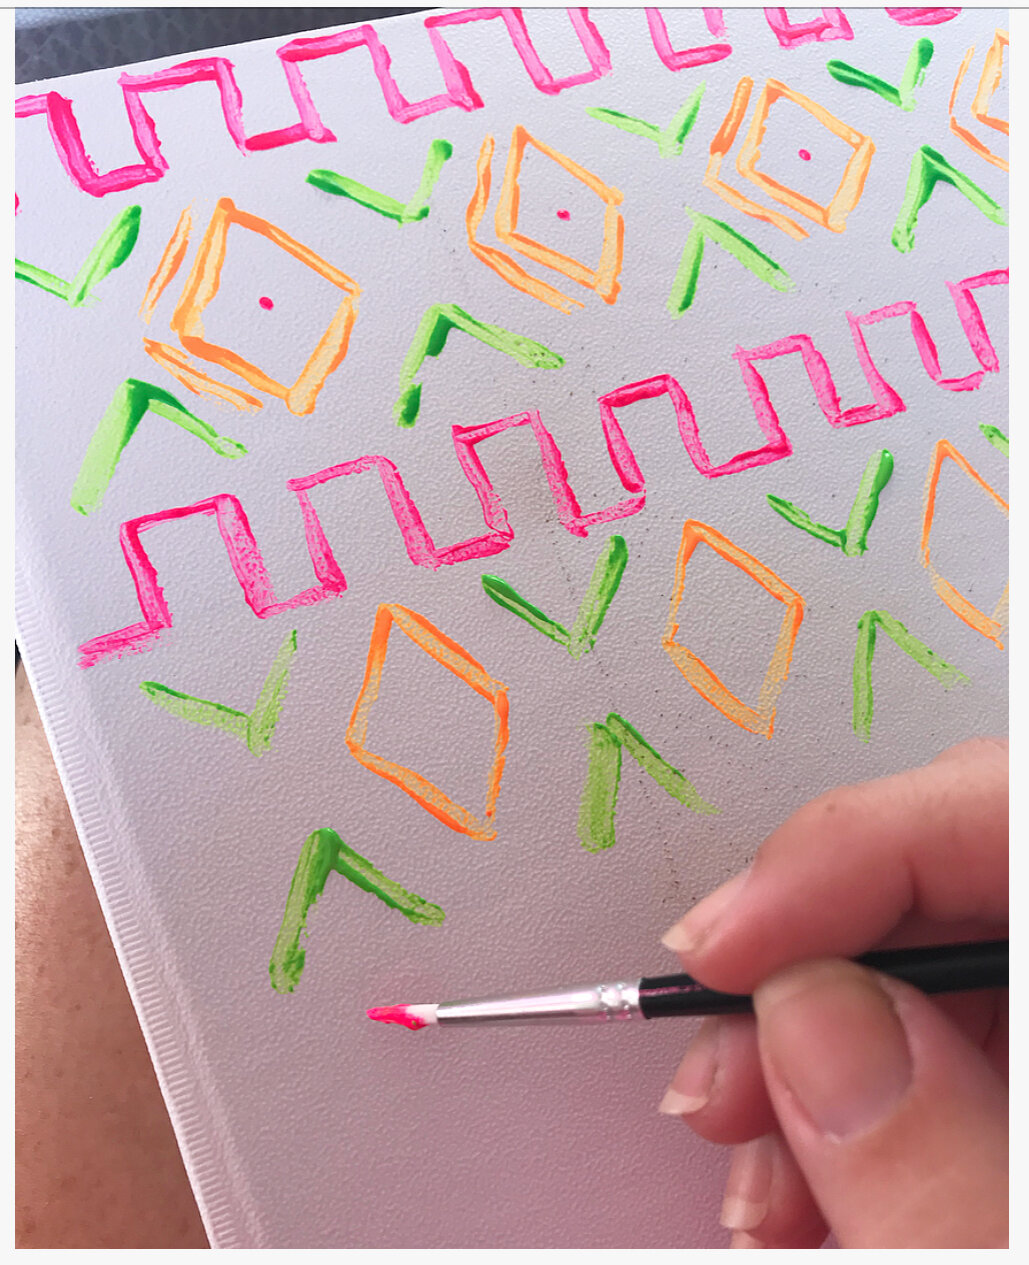
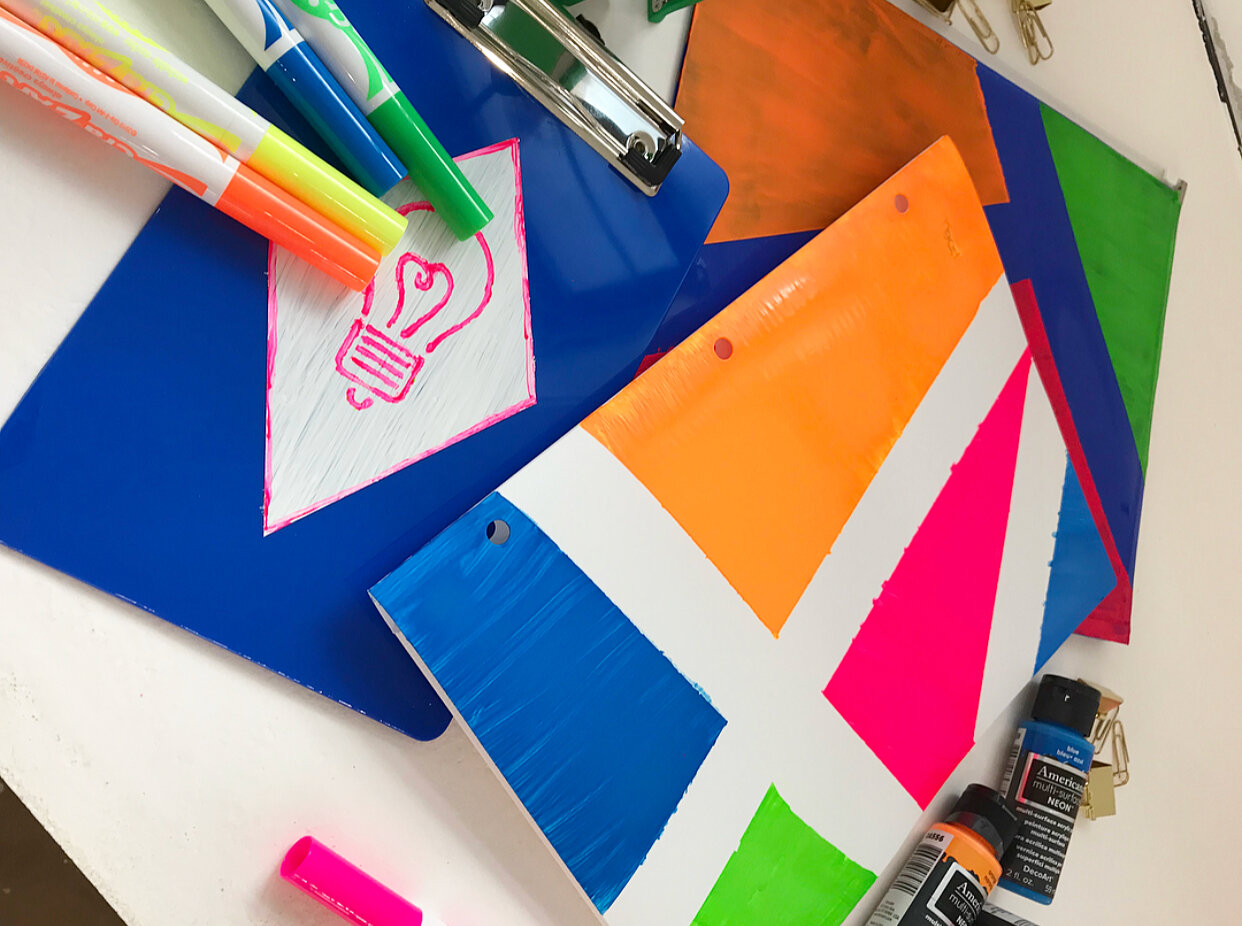
I started at the top left and applied the pink pattern first. Then, I painted the green "v" and next was the orange diamond. Afterwards, I started with the upside down "v" and continued this pattern until I was completely finished.
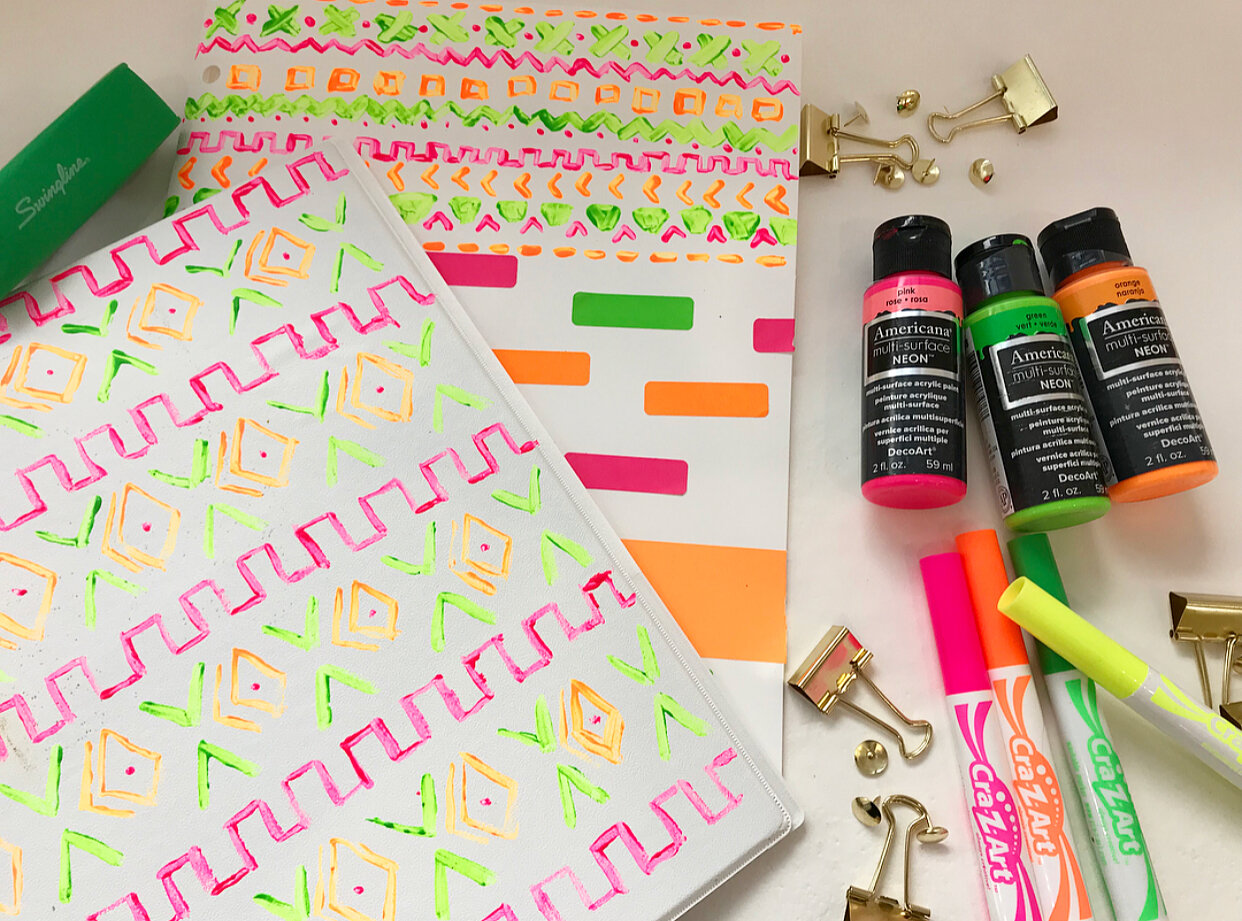
Project #2: Pencil Pouch, Folder and Clipboard
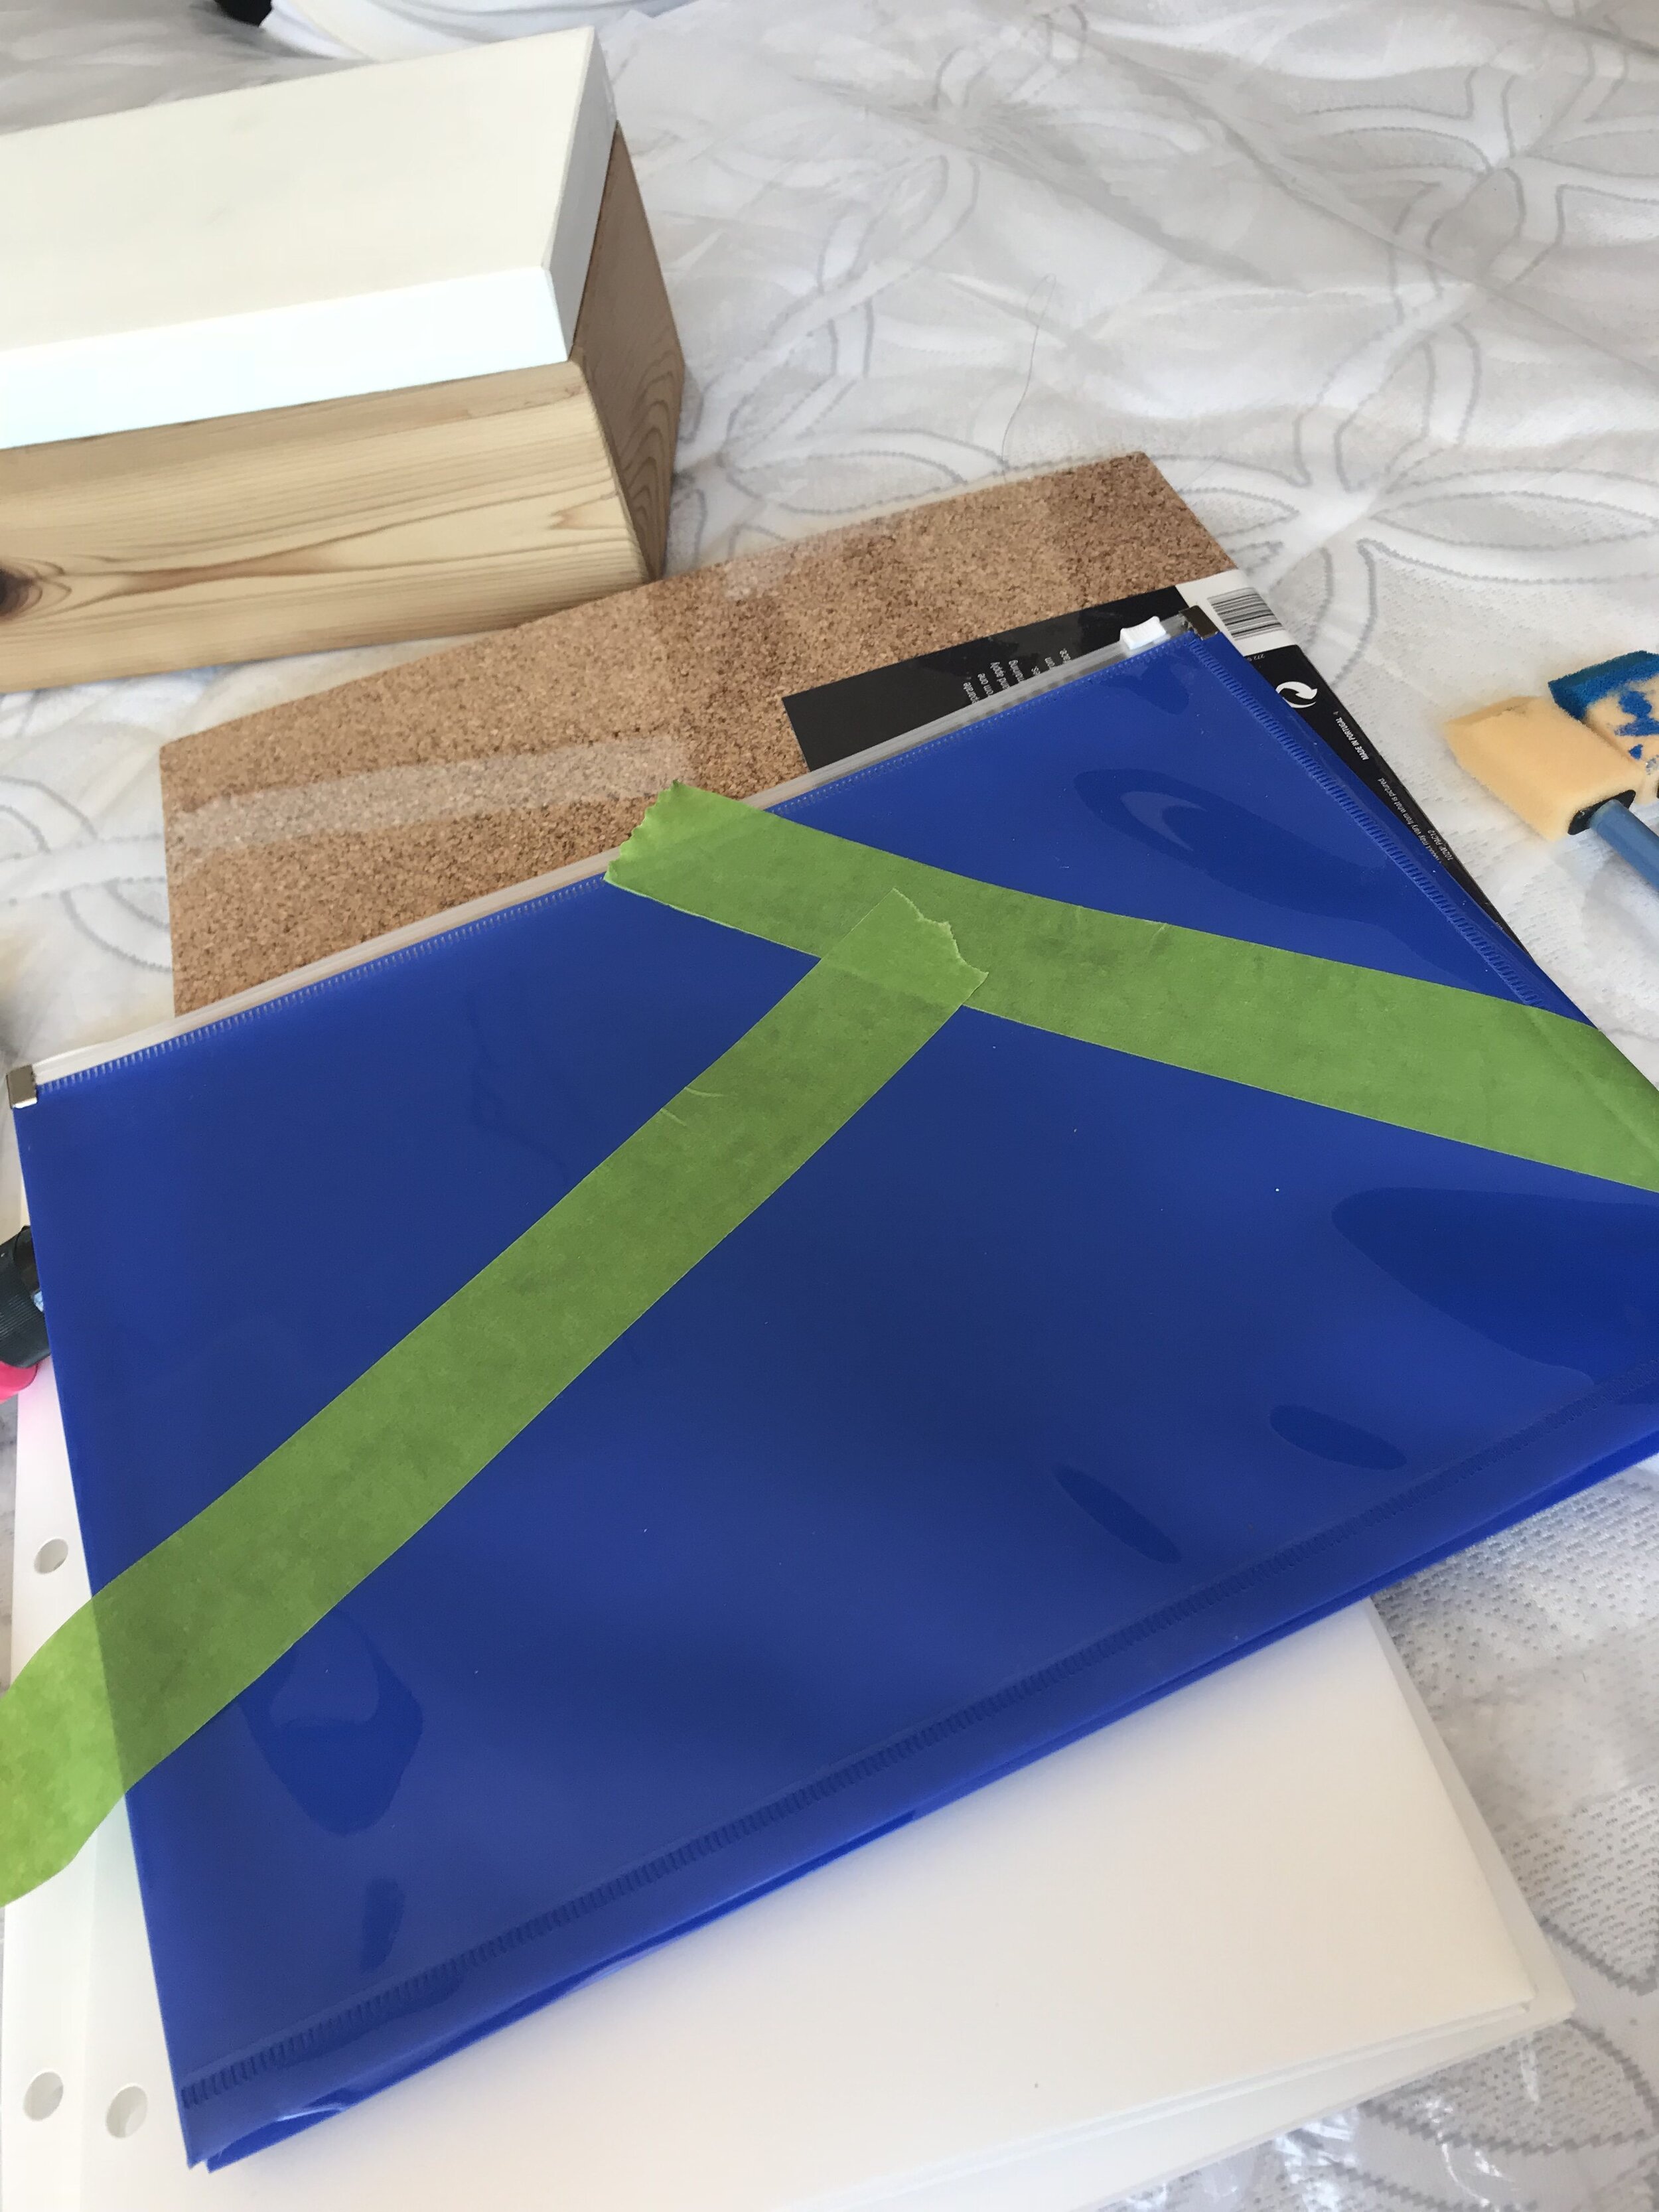
To get started, tape up your pencil pouch to mark off your edges til you've reached your desired shapes. (See below.)
For the folder and pencil pouch, I wanted them to have a color-blocked look to them, so I used more Frog Tape and taped off all the designs I needed to have complete.
I used the following paint colors for these school supplies:
neon pink
neon orange
neon green
cotton ball
blue bird (base coat)
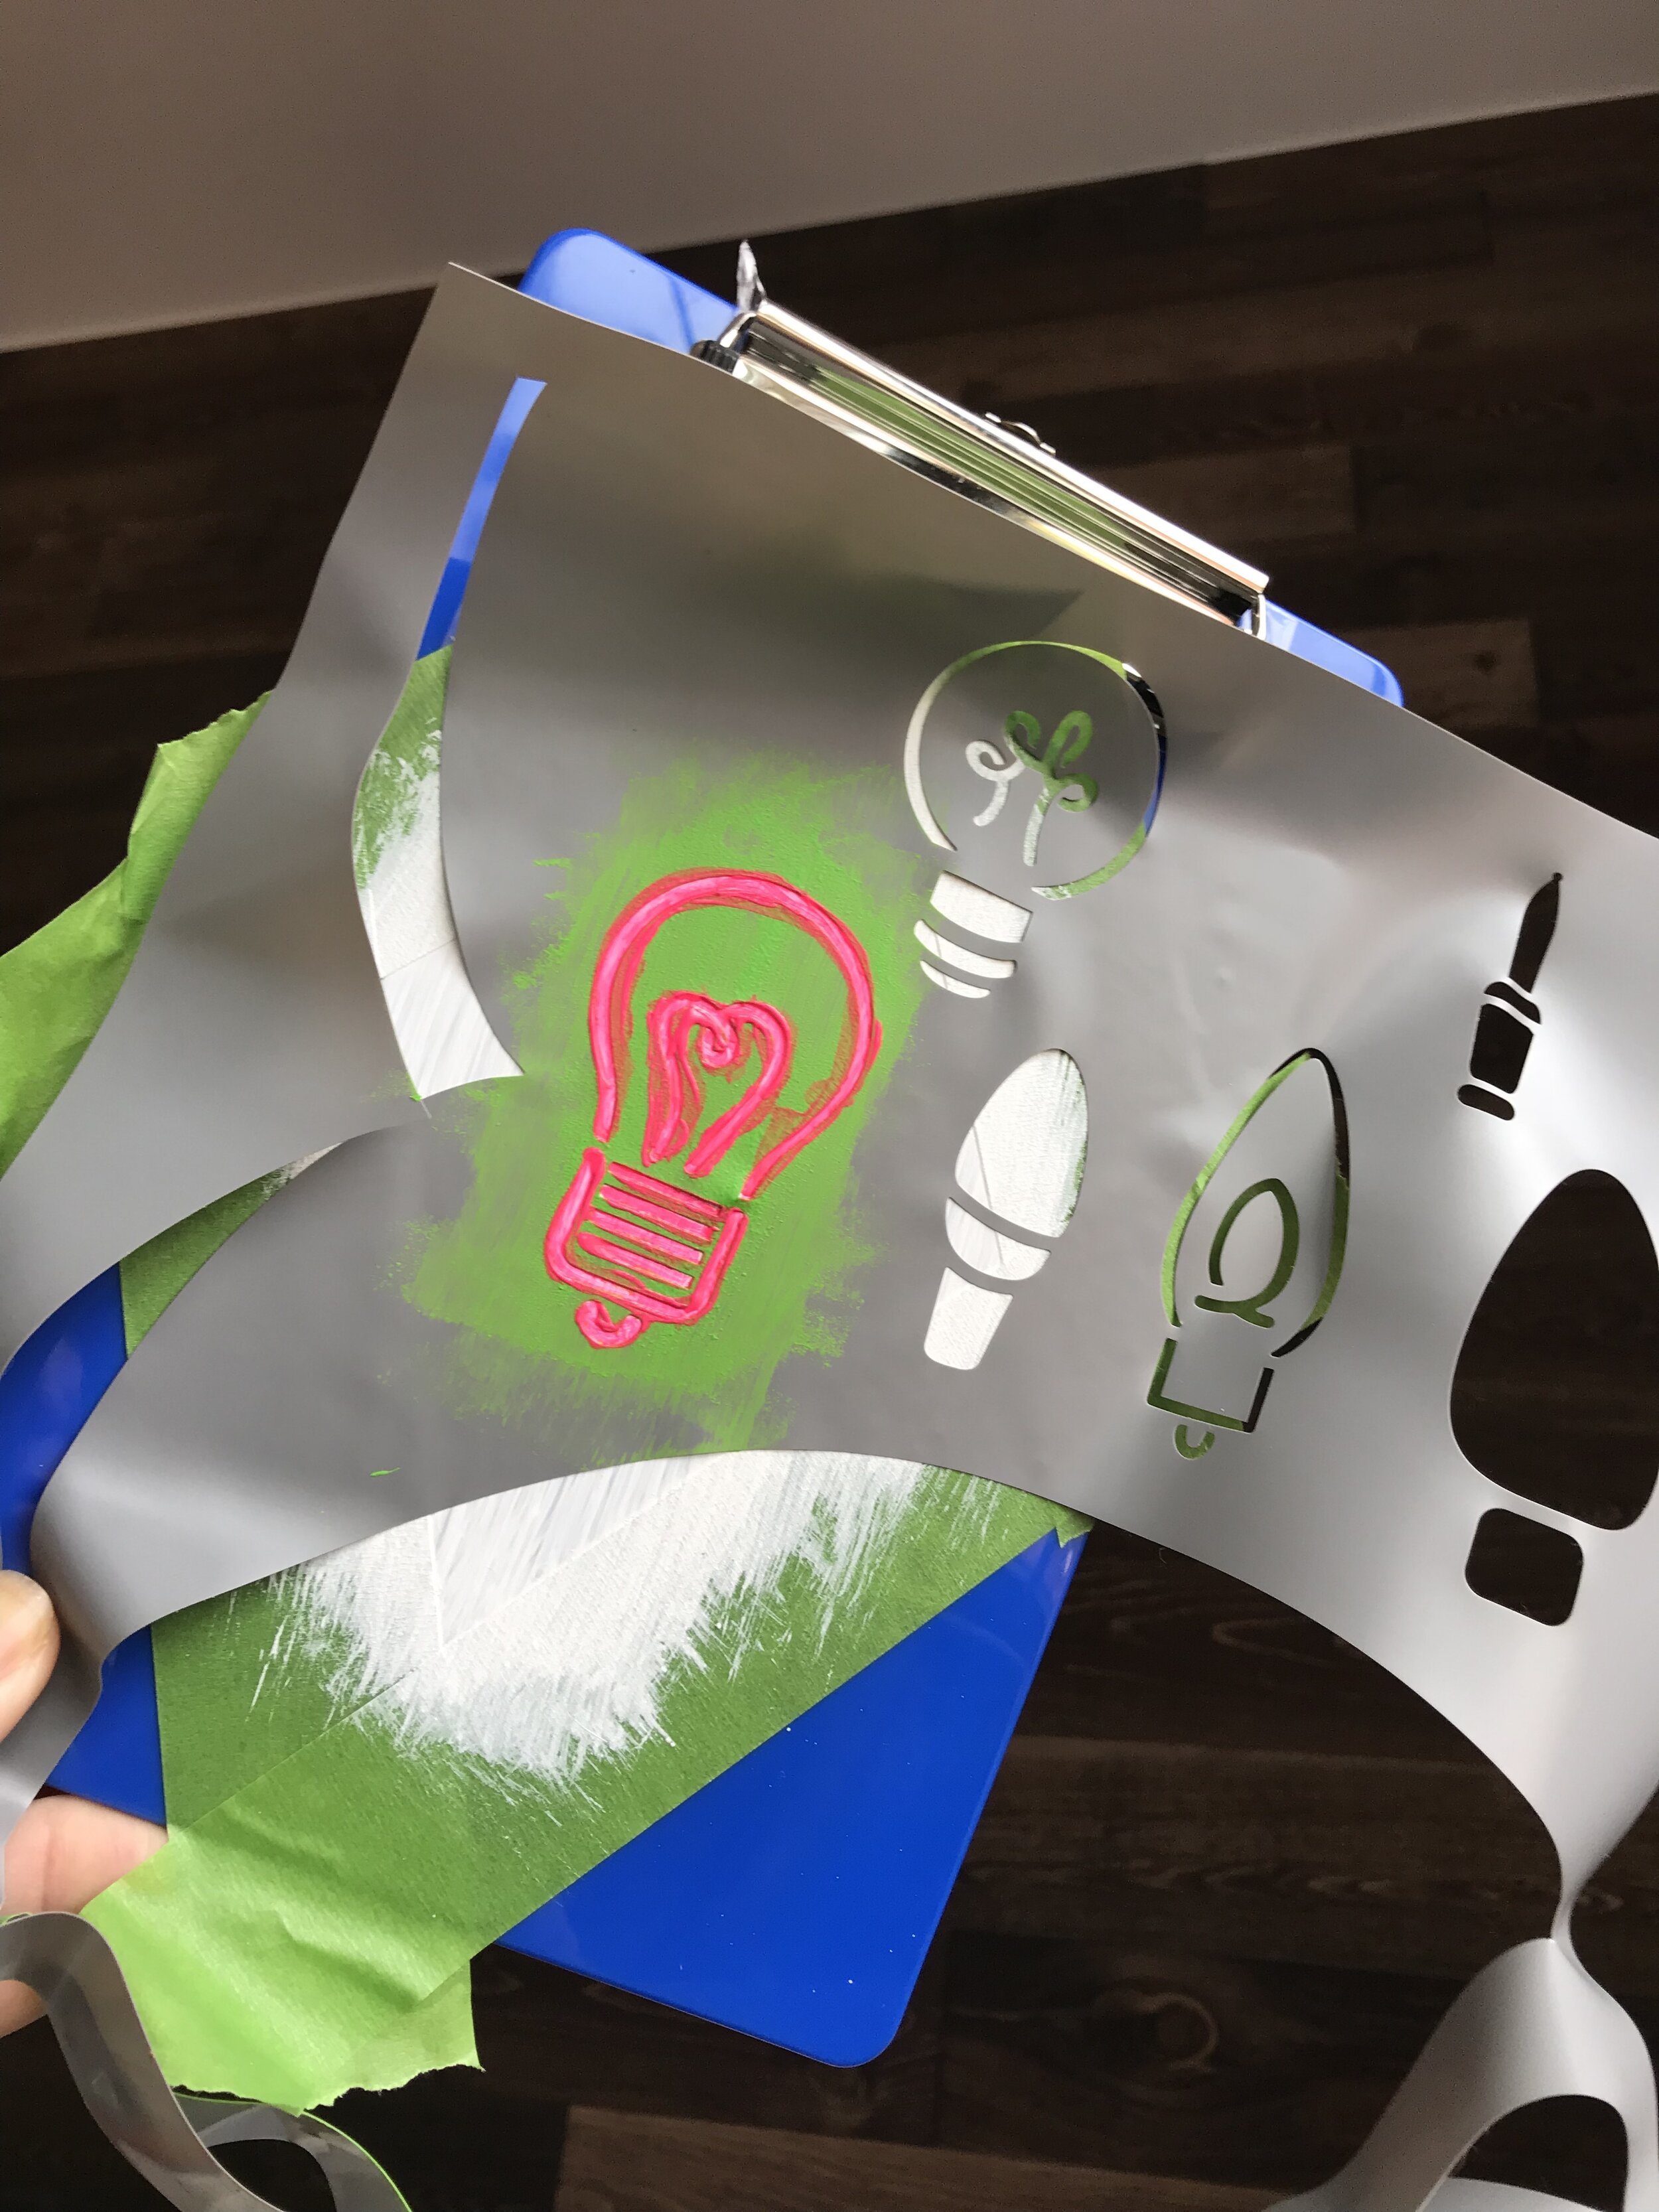
For the small clipboard, tape off your clipboard to form a diamond. Paint a few coats of the Americana multi-surface satin (color: cotton ball) to the inside of the diamond. Next, once the paint's dry, leave the tape on, and carefully center the light bulb stencil to the middle of the diamond.
Because the stencil is adhesive and reusable, you don't have to stress about attaching the stencil "just right" the first time. Lightly dust over the stencil using your acrylics (color: neon pink) and a small paint brush. Give it a few minutes to dry, and then remove the stencil. Before removing the frog tape around the diamond, outline the shape using a complimentary color.
You're now ready to remove the tape and enjoy your gorgeous work!
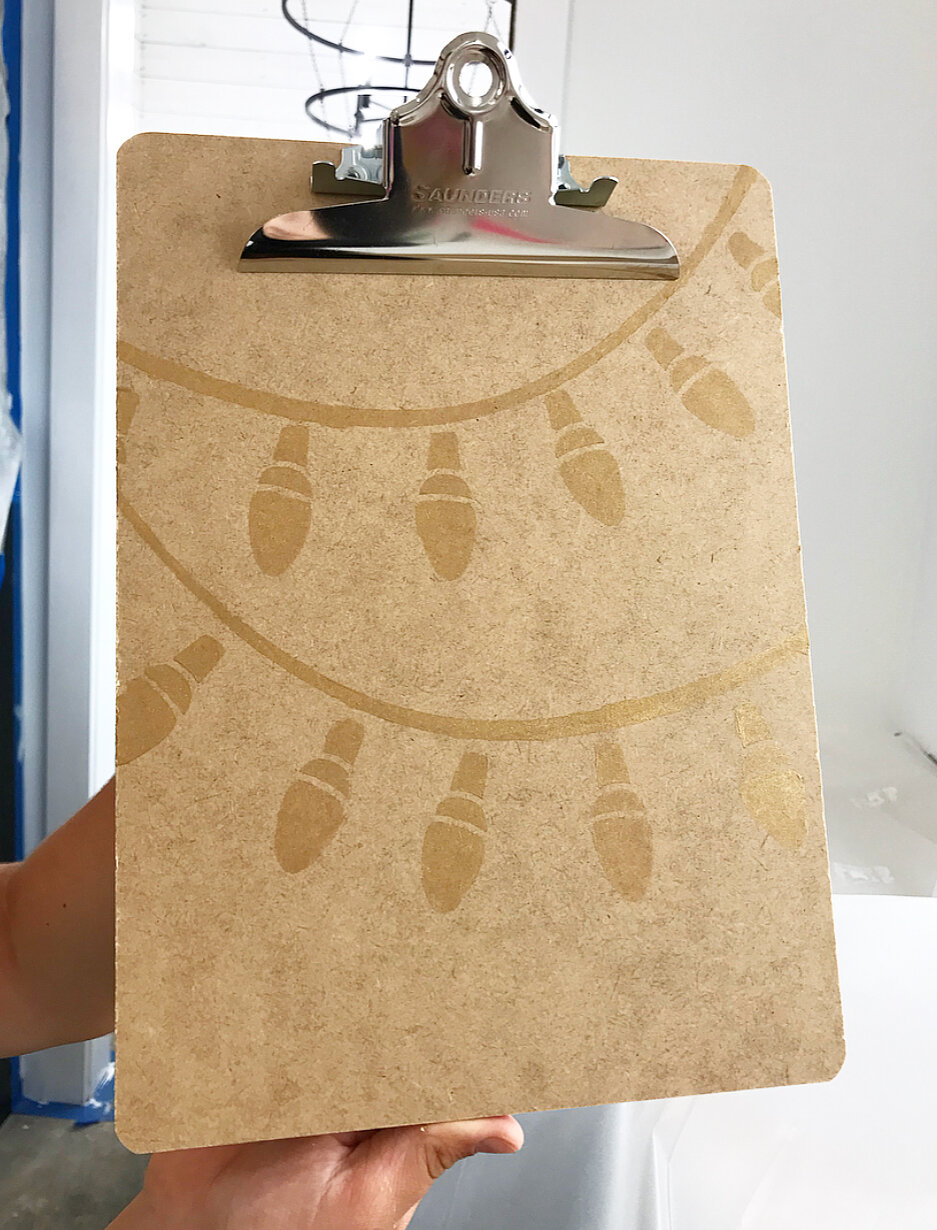
Project #3: "Bright Idea" Clipboards
Our final projects are these "bright idea" clipboards. This task was super easy....Just choose your desired "string" and "bulb" stencil for the clipboard, and then use the metallic gold paint to paint the stencils onto the clipboards. Easy peasy!


I hope y'all have been inspired to create beautiful and fun designs for your school or office supplies! Which one's your favorite out of these 3? I'd love to hear about them! Comment below or email me at TheRusticBoxwood@gmail.com. Also, if you’d like to follow along with us and read about our latest happenings, you can find me on Instagram, Facebook and Pinterest. I’d love for you guys to say hey. It always makes my day to hear from my sweet readers!
You might also like:

